How to Pay a Crypto Invoice (Even If You've Never Used Crypto Before)
If you've never bought or sent cryptocurrency before, paying a crypto invoice for the first time can feel intimidating. It isn't. This guide walks through exactly what you'll see on the payment page, where to get crypto if you don't have any yet, and clears up the one word that trips up almost everyone: "send."
Do You Already Have Crypto?
If you already have Bitcoin, Litecoin, Bitcoin Cash, or Monero sitting in a wallet or exchange account, skip ahead to Paying the Invoice, Step by Step. If not, keep reading.
Getting Crypto for the First Time
Where you get crypto from depends on where you live and what you already have installed on your phone.
In the United States
If you have PayPal or Cash App, you may already be able to buy crypto without installing anything new. Both let you buy Bitcoin directly with your existing balance or a linked card, and both let you send it out to an external address like the one on your invoice.
Everywhere Else (Including the EU and UK)
If buying crypto through PayPal or Cash App isn't available where you are, a cryptocurrency exchange is the standard route. Coinbase and Binance are two of the largest and most widely used - either lets you create an account, buy crypto with a card or bank transfer, and send it to an outside address.
Sign up, verify your identity (exchanges require this, unlike Litepay's own no-KYC Payment API), buy a small amount of whichever coin your invoice accepts, and you're ready for the next step.
"Send" - Might Be Called "Withdraw"
Here's the part that confuses almost every first-timer: your invoice will ask you to send crypto to an address. Many exchanges and wallet apps don't use the word "send" at all - they might call it Withdraw instead. It generally means the same thing: moving crypto out of your account to an external address. If you're hunting for how to pay and can't find "Send," check for "Withdraw."
Paying the Invoice, Step by Step
1. Choose Your Currency
When a merchant sends you an invoice, you'll land on a page showing the coins they accept - it might be just one, or several. Each shows its current exchange rate. Pick the one you have (or just bought).
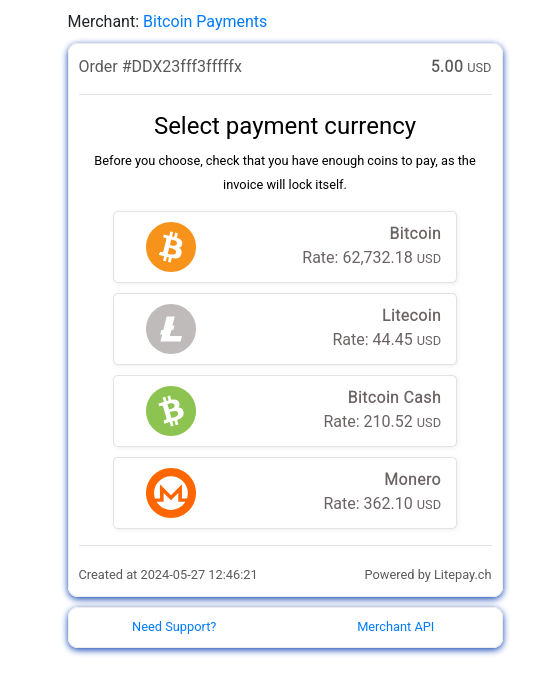
Double-check you have enough before choosing - once you pick a coin, the invoice locks itself in and generates a fixed price for it.
2. Send the Exact Amount Shown
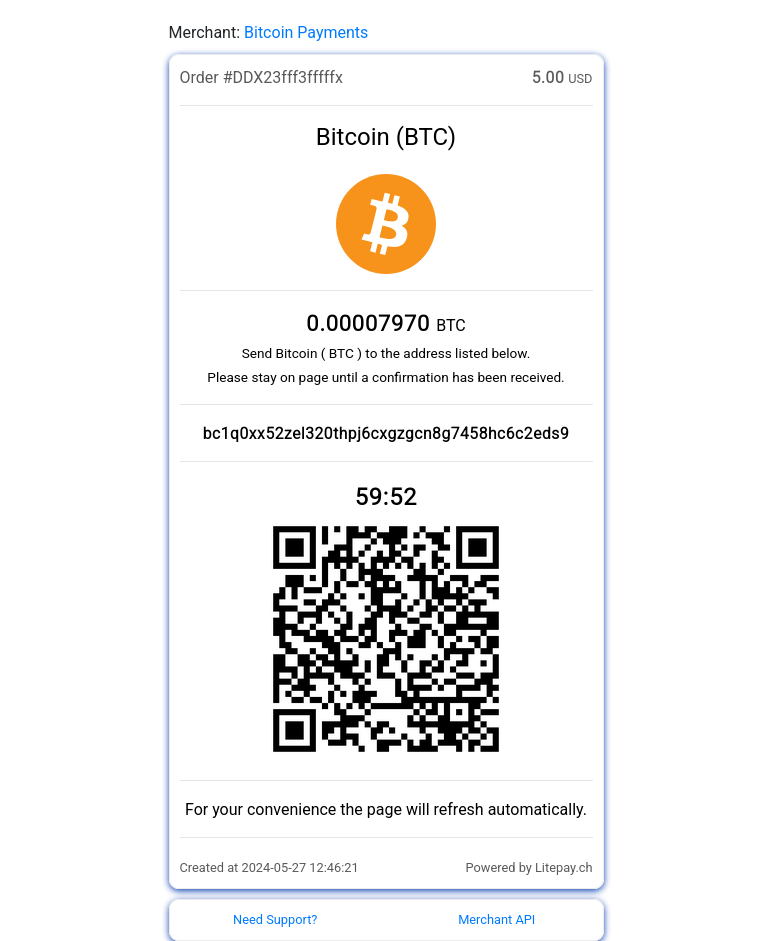
You'll now see a specific amount of crypto to send, an address, and a QR code. This is the important part: send exactly the amount shown, not an estimate.
- If you're paying from your phone, scanning the QR code with your wallet app is the easiest way - it fills in the address and amount automatically.
- If you're withdrawing from an exchange, copy the address exactly and enter the amount shown on the invoice.
One more thing to watch for: some exchanges take a fee out of what you send - sometimes just a network fee, sometimes their own fee on top of that too. That means if you tell your exchange to withdraw exactly the amount on your invoice, what actually arrives could come up short. Check whether your exchange shows a separate "you will receive" amount, and adjust upward if needed so the full invoice amount arrives.
There's a countdown timer on this page, usually around an hour. If it runs out before you pay, nothing is lost - the page simply resets back to step 1 so you can start over with a fresh rate.
3. Wait for the Network to See It
Once your payment is sent, the page will update to let you know it's been seen.
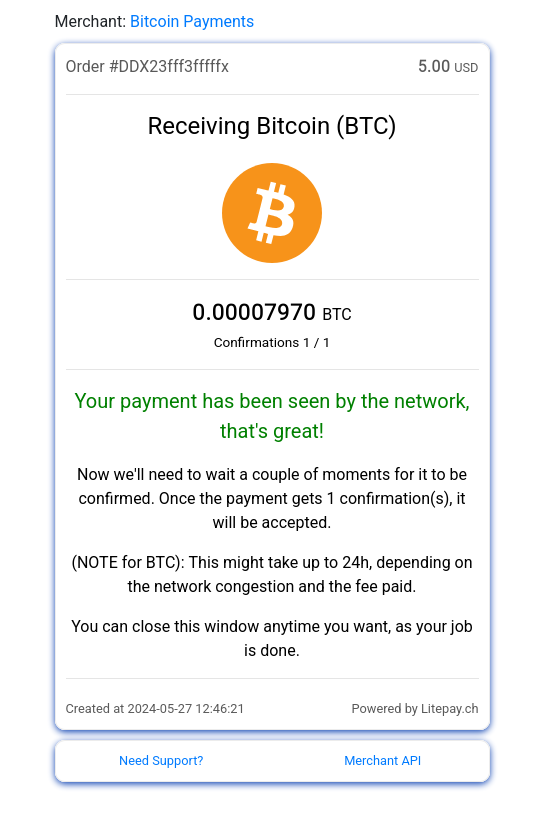
At this point, your job is done - you can safely close the window. Litepay is now waiting for the transaction to get its required confirmation from the blockchain network before marking it as fully paid. This isn't something Litepay controls - it depends on the specific cryptocurrency's network and how busy it is. For Bitcoin especially, this is usually quick, but can occasionally take a few hours during periods of heavy network congestion.
4. Payment Confirmed
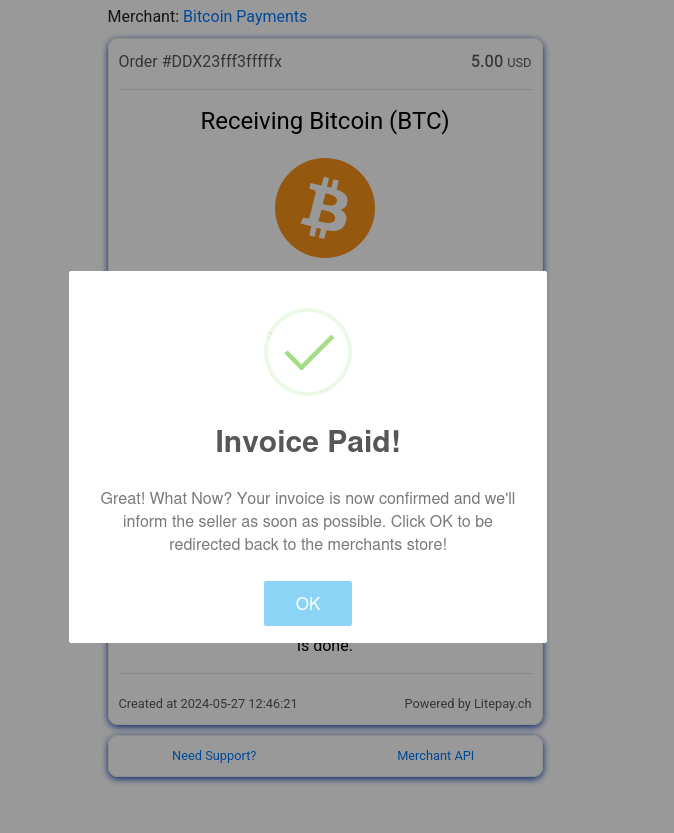
Once confirmed, the invoice is marked paid and the merchant is notified automatically. You'll be redirected back to the merchant's store, where your purchase or service is waiting.
FAQ
I selected the wrong coin - can I change it?
Yes, as long as you haven't sent a payment yet. Once a payment is detected for the coin you picked, the invoice locks to that page.
The timer ran out before I paid. Did I lose anything?
No. The invoice simply resets back to the currency selection step. Nothing was charged, and you can start again with a current rate.
Why hasn't my payment been accepted yet?
Once the network has "seen" your payment, it still needs to be confirmed on the blockchain before the invoice is marked paid. This depends entirely on network conditions, not on anything Litepay is doing.
Do I need to keep the page open the whole time?
Only until you see the "seen by the network" message. After that, your part is done and you can close the window.
What if I send the wrong amount?
If you send too little, you have 24 hours to send the difference and top up the payment. If you send too much, the full amount is still forwarded to the merchant as-is - you'd need to request a refund of the difference directly from them.